Opening a mosaic crochet pattern for the first time can feel like being handed a spreadsheet instead of a set of instructions. There's a grid full of colored squares, maybe a legend, maybe some written notes on the side — and it's not always obvious where to start, or why the colors on the chart don't always seem to match what you're actually crocheting row by row. Here's exactly how to read one, step by step.
Start With the Pattern Key
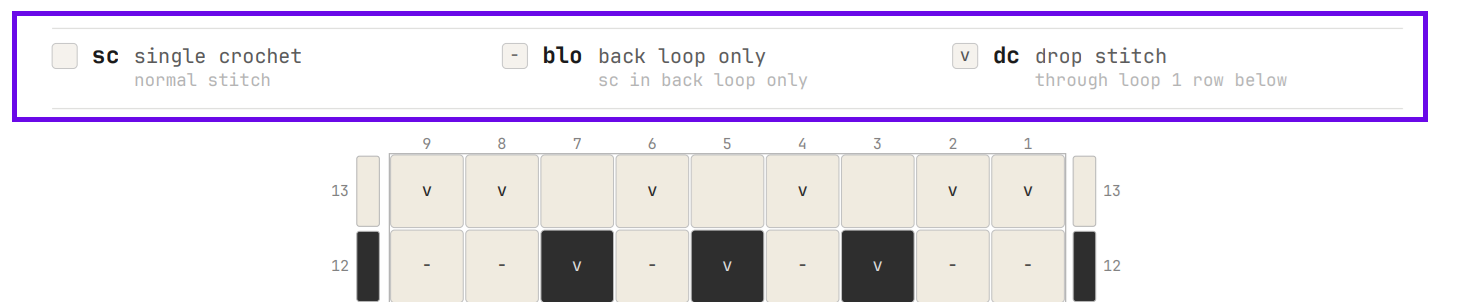
Before looking at the chart itself, find the key or legend — almost every mosaic pattern includes one. In mosaic crochet, the legend has one job: telling you which symbol or shading on the chart corresponds to which stitch.
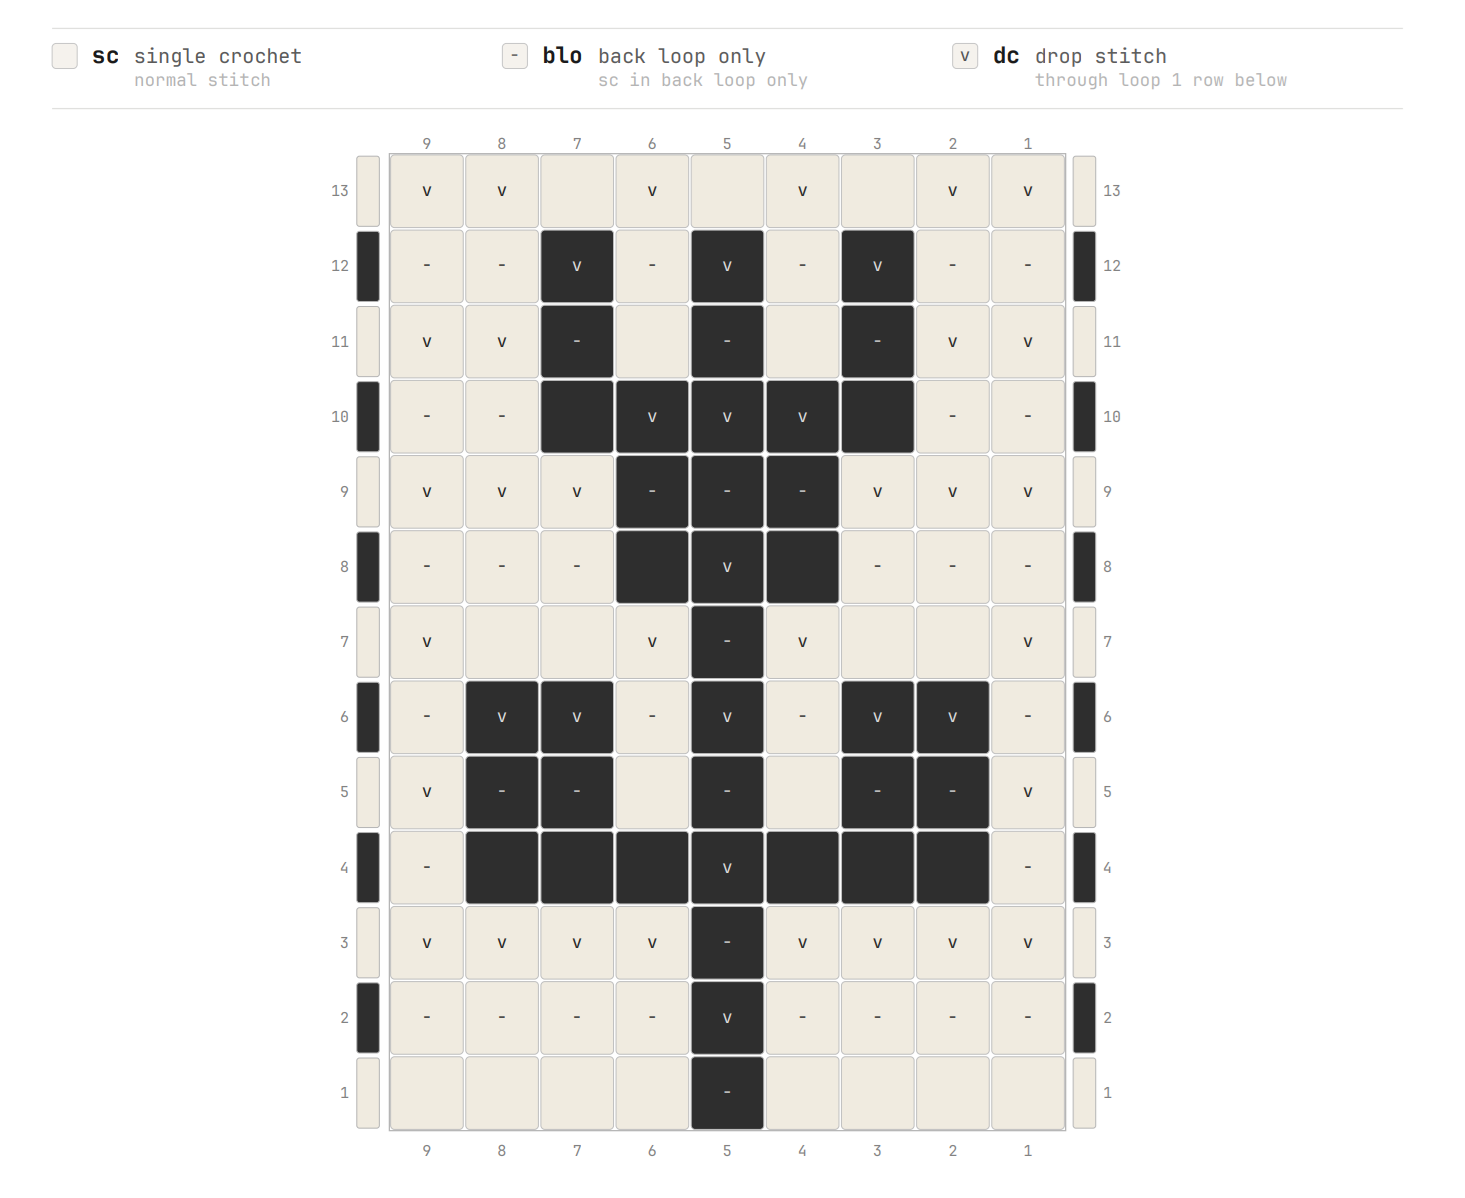
Charts made in Mosaicery always show all three stitches explicitly: sc (single crochet), blo (single crochet through the back loop only), and dc (the "drop-down" double crochet that reaches into the row below). Nothing is left implied — every square tells you exactly which of the three stitches to work.
However that's not the case everywhere. A lot of mosaic charts you'll find online only mark the drop-down stitch (dc), and leave the rest of the chart blank. If you come across one of those, there's a simple rule to fall back on: the square directly below a drop-down stitch is always worked as blo. So even when a chart doesn't spell it out, you can still figure out the background stitch by looking at what sits above it.
Orient Yourself on the Grid
Overlay mosaic crochet is always worked on the right side of the fabric — you never turn your work. That single fact determines how the chart is read:
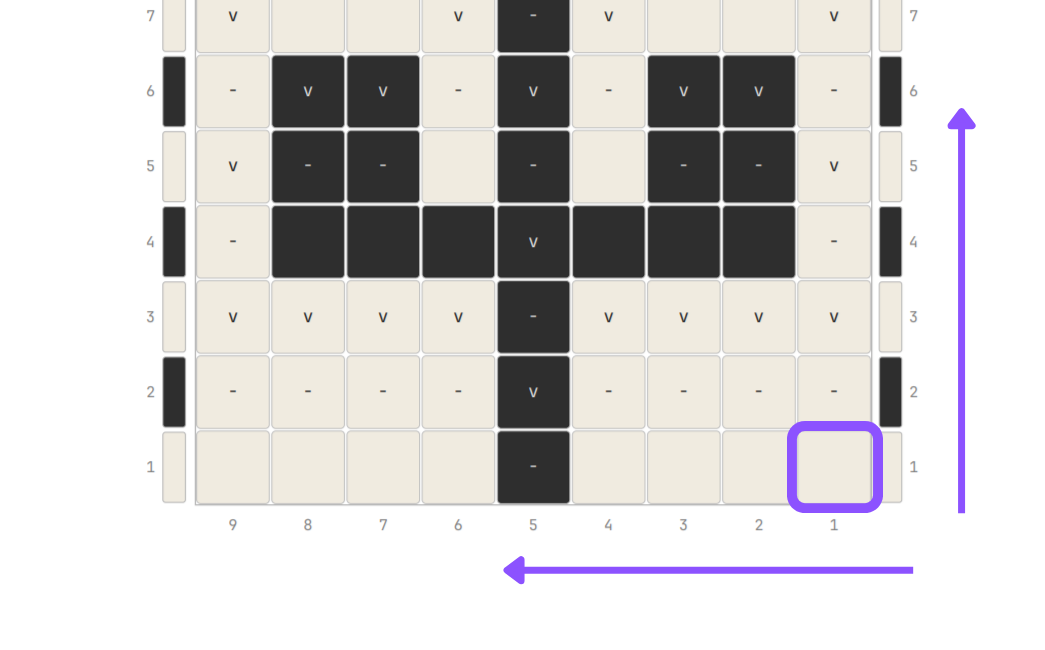
- Bottom to top — row 1 is at the bottom of the chart, not the top
- Right to left for right-handed or left to right for left-handed crocheters — since you're always working the right side and never turning, you read every single row in the same direction, not alternating like you would in rows you turn
- Each row of squares = one row of your work
- Each column of squares = one stitch
Each row on the chart is also marked with the yarn color for that row — this is what tells you which color to pick up, not the individual squares within the row (more on that below).
If you take nothing else from this guide, take this: find row 1 at the bottom before you do anything else. Reading from the top down is the single most common way beginners get lost.
The Part That Actually Trips Beginners Up: Color vs. Stitch
Here's the detail that causes the most confusion, and it's worth slowing down for.
Mosaic crochet alternates yarn color every single row — Row 1 is Color A, Row 2 is Color B, Row 3 is Color A, Row 4 is Color B, and so on. So while you're crocheting, you always know exactly which yarn is in your hands based on which row you're on.
But when you look at the chart, a square's color doesn't tell you which yarn you're holding for that row. It tells you which color that stitch contributes to in the finished design. And because mosaic crochet stitches are worked reaching down into a previous row, the square you're looking at on your current row might show a color that belongs to a row you haven't worked yet — the color of the drop-down stitch that a later row will reach back and place there.
A Worked Example: Reading the First Two Rows
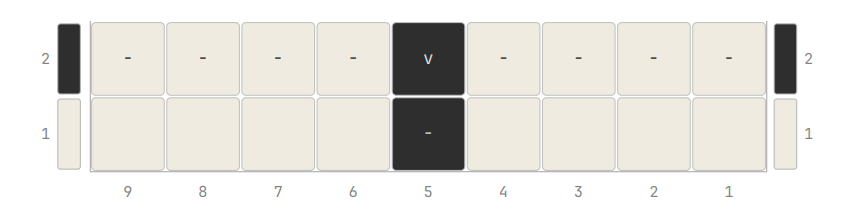
Take a look at the first two rows of a chart above. The bars on the left and right show the yarn color for each row: Row 1 is worked in Color A (light), Row 2 in Color B (dark).
Row 1: reading across, every square is a plain background stitch — except square 5, which appears in a dark color. Don't let that color distract you. The stitch you actually work there is still a straightforward single crochet, through the back loop only (BLO). Every other square in Row 1 is a standard single crochet (SC).
Row 2: pick up Color B and work across. Squares 1-4 and 6-9 are worked as BLO with the current row color. Square 5 is marked with a different symbol: this is the drop-down stitch (dc), reaching back down to cover the square you worked in Row 1. That's the stitch that finally makes the shaded square from Row 1 visible in your finished piece — one row later than where you first saw the color hint.
Keep in mind: after just these two rows, your piece won't look like the chart yet — you'll simply have a plain cream row topped by a plain dark row. The design appears once Row 3's drop-down stitch reaches back and covers it.